How to Pick the Best Mat for an Indoor Bike Trainer
Setting up an indoor bike trainer is exciting. You have the bike, the trainer, and the motivation to ride through any season. However, one essential item often gets overlooked until it is too late: the mat underneath your setup.
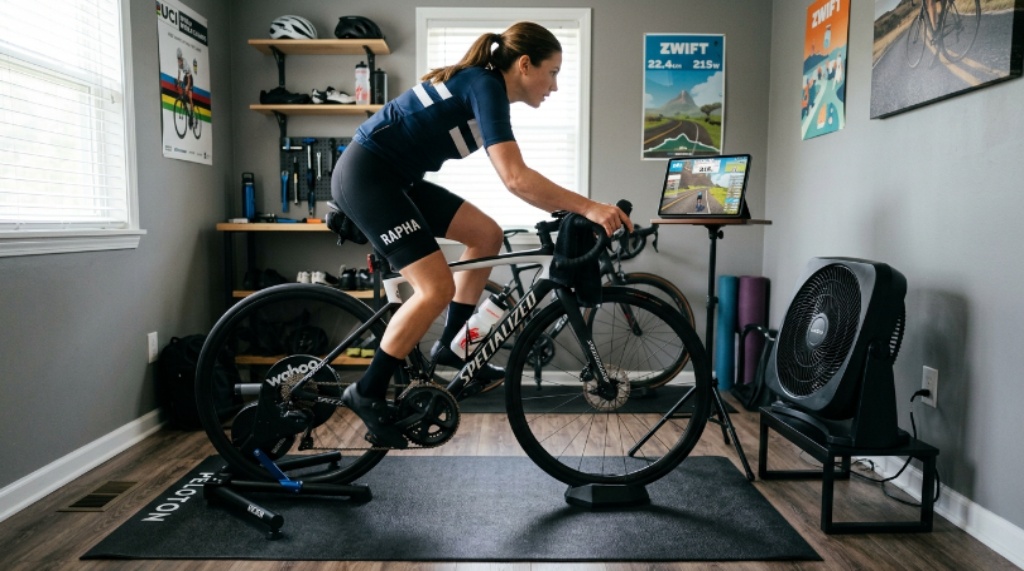
A trainer mat does far more than protect your floor. It absorbs vibration, prevents slipping, collects sweat, and keeps noise levels manageable for everyone in the house. Get it wrong and you risk damaged flooring, a wobbly setup, and friction with your neighbours or housemates. Get it right and your whole cycling trainer setup becomes more stable, more comfortable, and easier to maintain.
This guide walks you through everything you need to know to choose the right mat for your indoor bike trainer, no matter what type of flooring you have or how much space you are working with.
Why a Trainer Mat Is Not Optional
Some cyclists skip the mat entirely, especially when they are just starting out. It seems like an unnecessary extra expense. However, the consequences of training without one become clear very quickly.
Sweat is the first issue. Indoor cycling generates a surprising amount of perspiration. Without a mat, sweat drips directly onto your floor. On hardwood or laminate surfaces, repeated moisture exposure causes warping, staining, and long-term structural damage. On carpet, it creates stubborn odours and encourages mould growth over time.
Vibration is the second issue. Even the quietest smart trainers produce some degree of vibration and noise. Hard floors amplify both. A good mat acts as a buffer, dampening vibration before it travels through the floor and into the rooms below. This is particularly important in apartments or multi-storey homes where sound transmission can disturb others.
Stability is the third concern. Without a mat, your trainer can shift gradually during a hard effort. On smooth or polished floors, this movement can become unpredictable. A textured mat keeps your trainer firmly in place, giving you confidence to push hard without worrying about slipping.
Therefore, a trainer mat is not a luxury. It is a fundamental part of any responsible indoor cycling setup.
Understanding the Different Types of Trainer Mats
Not all trainer mats are the same. They vary in material, thickness, size, and intended use. Understanding the differences helps you match the right product to your specific needs.
Foam Mats
Foam mats are the most common and most affordable option. They are made from EVA foam, the same material used in gym flooring tiles and children’s play mats. EVA foam is lightweight, easy to clean, and available in a wide range of thicknesses.
Thinner foam mats, around 4 to 6 millimetres, provide basic floor protection and grip. Thicker options, from 8 to 12 millimetres, absorb more vibration and offer better cushioning for the trainer feet. However, very thick foam can feel unstable under a heavy direct-drive trainer. For most setups, 6 to 8 millimetres strikes a practical balance.
Rubber Mats
Rubber mats are heavier and more durable than foam. They provide excellent grip on almost any floor surface and handle moisture well. High-density rubber absorbs vibration effectively, which makes it a popular choice for cyclists using powerful smart trainers in apartments.
The main drawbacks of rubber mats are weight and price. A thick rubber mat can be difficult to move and roll up, and quality options cost more than comparable foam products. However, they tend to outlast foam significantly, making the investment worthwhile for serious indoor cyclists.
Purpose-Built Cycling Trainer Mats
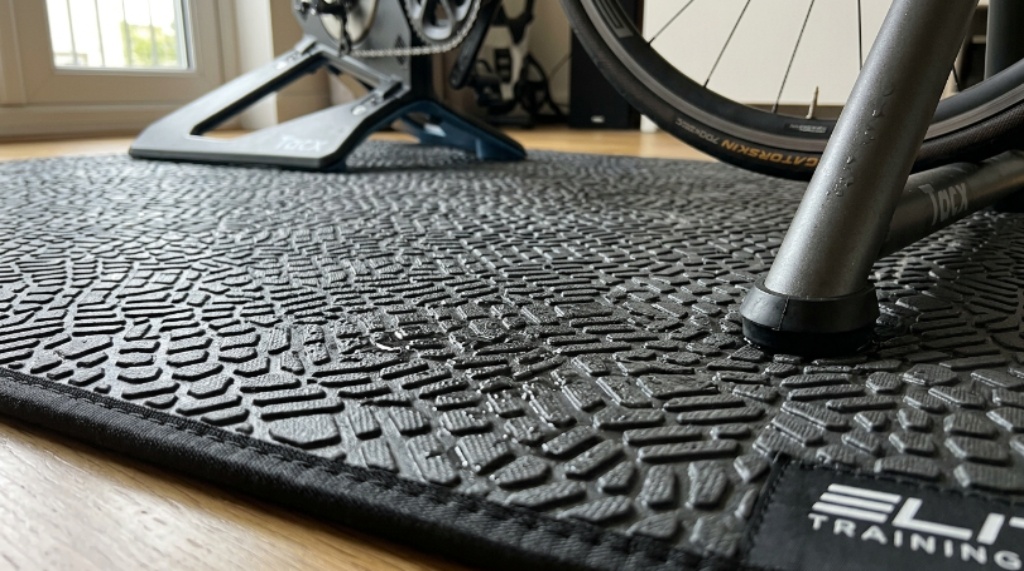
Several cycling brands produce mats designed specifically for indoor bike trainers. These often feature a textured surface pattern optimised for trainer feet, a water-resistant top layer for easy sweat cleanup, and a non-slip underside. Some include reinforced zones where trainer contact points create the most pressure.
These purpose-built options are worth considering as part of a complete smart trainer accessories package, particularly if you are buying a high-end trainer and want every component to work together seamlessly.
How to Choose the Right Size
Size is one of the most important factors and one of the most commonly misjudged. A mat that is too small will not protect your floor effectively. One that is too large creates clutter and can become a tripping hazard.
Measuring Your Setup Correctly
Start by measuring the footprint of your trainer, including the stabiliser arms or feet that extend outward. Add at least 30 centimetres to each side to account for sweat drip and minor movement during your sessions. Also consider the front wheel block if you use one, as this adds length to the overall footprint.
A typical indoor cycling mat runs between 90 and 100 centimetres wide and 180 to 200 centimetres long. This suits most bike and trainer combinations comfortably. If you are particularly tall, ride a larger frame, or use a trainer with wide outriggers, look for a larger option or consider joining two foam tiles together.
Room Layout Considerations
Think about the shape of your training space as well. A rectangular mat fits most rooms and setups. However, some cyclists prefer an L-shaped configuration using modular foam tiles to cover a larger area without filling the whole room. This works especially well when you want to leave space for a fan, a side table for your water bottle, or a small floor mat for stretching after your ride.
Matching Your Mat to Your Floor Type
The floor beneath your mat plays a significant role in which mat will work best for you. Different floor types create different challenges, and not every mat addresses all of them equally well.
Hardwood and Laminate Floors
These surfaces are most vulnerable to sweat damage and scratching. For hardwood and laminate, choose a mat with a soft, non-abrasive underside. Some rubber mats contain plasticisers that can react with certain floor finishes and cause discolouration over time. Look for rubber mats labelled as floor-safe or PVC-free to avoid this issue. A foam mat with a smooth underside is a safer choice if you are concerned about chemical interactions.
Floor protection is the primary goal on these surfaces. Therefore, prioritise a mat that covers the full footprint of your setup with a generous margin on all sides.
Carpet
Carpet already provides some cushioning and noise absorption. However, trainer mats on carpet still serve an important purpose. They prevent sweat from soaking into carpet fibres, stop the trainer from slowly sinking into soft carpet pile, and provide a firmer, more level surface for your trainer feet.
On carpet, a thinner mat is usually sufficient. A 4 to 6 millimetre foam mat or a purpose-built trainer mat works well. Avoid very thick rubber mats on soft carpet, as the combination can create an uneven surface that affects stability.
Garage and Concrete Floors
Concrete is hard, cold, and often slightly uneven. A thicker mat performs better here. The extra cushioning compensates for the hardness of the surface and helps level out minor imperfections in the floor. A high-density rubber mat or a thick EVA foam tile system works very well in a garage environment.
Additionally, garage floors can be damp. Choose a mat made from moisture-resistant materials and check periodically that moisture is not collecting underneath it, as this can lead to mould or floor degradation over time.
Noise and Vibration Control
For many indoor cyclists, noise is the most pressing concern. Living in an apartment or a shared home means that every pedal stroke, flywheel rotation, and trainer vibration can travel through the floor to the rooms below.
A mat alone will not eliminate all trainer noise. However, it makes a significant difference. Thicker, denser materials absorb more vibration and therefore transmit less sound. If noise reduction is a priority, consider layering materials. Place a high-density rubber mat on the floor first, then add a purpose-built trainer mat or foam tile on top. This double-layer approach is one of the most effective floor protection strategies for apartment cyclists.
Additionally, ensure your trainer feet are sitting flat and centred on the mat. Uneven placement allows vibration to escape around the edges and reduces the mat’s effectiveness.
Maintenance and Longevity
A good trainer mat lasts for years, but only with basic care. After each session, wipe down the surface with a damp cloth to remove sweat. Allow it to air dry fully before rolling it up or covering it with your bike. Leaving sweat sitting on a foam mat degrades the material over time and creates unpleasant odours.
Periodically lift the mat and clean the floor beneath it. Moisture can collect underneath if sweat seeps through the edges or if your room has any ambient humidity. Letting the underside air out every few weeks keeps everything fresh and prevents long-term floor damage.
If your mat develops a permanent compression groove where the trainer feet sit, it is time to replace it. A compressed mat no longer absorbs vibration effectively and provides less grip than a fresh surface.
Conclusion
Choosing the right mat for your indoor bike trainer is a small decision with a big impact. A well-matched mat protects your floors, reduces noise, improves stability, and keeps your training space cleaner and more enjoyable to use.
Start by identifying your floor type and measuring your full setup footprint. Then choose a material that suits your priorities, whether that is budget-friendly foam, durable rubber, or a purpose-built product from a cycling brand. Consider thickness for vibration control, size for full coverage, and material compatibility for your specific flooring.
A quality mat ties your whole cycling trainer setup together and gives every session a more professional, focused feel. Combined with the right smart trainer accessories, it turns any spare room or garage into a genuinely effective training environment. Do not leave it as an afterthought. Choose well from the start and your floors, your neighbours, and your training performance will all benefit.
Frequently Asked Questions
How thick should a trainer mat be for a smart trainer?
For most smart trainers, a mat between 6 and 10 millimetres thick provides a good balance of floor protection and vibration absorption. Thicker mats absorb more noise but can feel slightly unstable under very heavy direct-drive trainers. If noise is a priority, consider layering a thinner trainer mat over a dense rubber base mat.
Can I use a yoga mat instead of a dedicated trainer mat?
A yoga mat is better than nothing, but it is not ideal. Yoga mats are typically too narrow and too thin to cover the full footprint of a trainer setup or to absorb meaningful vibration. They also degrade quickly under the combination of weight, heat, and repeated sweat exposure. A dedicated trainer mat is a worthwhile upgrade.
Will a trainer mat damage my hardwood floor?
Most quality trainer mats are designed to be floor-safe. However, some rubber mats contain compounds that can react with certain floor finishes. To be safe, choose a mat labelled as PVC-free or floor-safe, or place a thin protective layer between the mat and the floor if you are concerned.
How do I stop my trainer mat from sliding on a smooth floor?
Look for a mat with a textured or patterned underside designed for grip. Alternatively, use double-sided rug tape at the corners to anchor the mat to the floor. On very smooth surfaces, a rubber mat with a natural rubber underside provides the most reliable grip without tape.
How often should I replace my trainer mat?
A quality trainer mat should last two to four years with regular use and proper care. Signs that replacement is needed include permanent compression grooves under trainer feet, crumbling or cracking edges, persistent odour that does not clear with cleaning, or a noticeable reduction in grip or vibration absorption.